대표어
대표어
권호기사보기
| 기사명 | 저자명 | 페이지 | 원문 | 기사목차 |
|---|
결과 내 검색
동의어 포함
표제지
[사진]
제출문
요약문
SUMMARY
Contents
목차
제1장 서론 33
제2장 AUV 기계시스템 제작 38
2.1. 주요 장비의 배치 38
2.2. 선체 제작 39
2.2.1. 주 선체 프레임 39
2.2.2. 장애물회피 소나 캔 40
2.2.3. 카메라 시스템 41
2.2.4. 무게추 고정용 전자석 43
2.2.5. 추진기 45
2.2.6. 주 내압용기 47
2.2.7. 밧데리 48
2.2.8. 각종 소나 센서의 고정 49
2.2.9. 승강타 구동 장치 50
2.2.10. 승강타 및 수직 안정판 51
2.2.11. 프레임 52
2.2.12. 선각 52
2.3. 중량 및 부력 계산 52
2.4. 결언 53
제3장 VORAM AUV의 전기시스템 54
3.1. 서언 54
3.2. VORAM AUV의 전기시스템 구성과 탑재 55
3.3. 커넥터 정의 및 핀 할당 60
3.3.1. 커넥터 정의 60
3.3.2. 커넥터 핀 할당 64
3.4. 계통도 73
3.5. 전원부 77
3.5.1. 축전지 77
3.5.2. 전원변환장치 78
3.5.3. 전원의 제어 79
3.6. 제어부 80
3.6.1. 주제어기 80
3.6.2. 비상상태 제어부 82
3.7. 구동부 83
3.7.1. 추진 모터 84
3.7.2. 승강타 모터 구동부 85
3.8. 요약 86
제4장 VORAM AUV의 계측시스템 87
4.1. 서언 87
4.2. 회피소나시스템 88
4.3. 유속계 92
4.4. 운동계측장치 94
4.5. 비디오 카메라 및 레코더 97
4.6. 기타 99
4.6.1. 압력계 99
4.6.2. 전압계 100
4.6.3. 염도계 100
4.6.4. 누수계 100
4.7. 요약 101
제5장 통신시스템 102
5.1. 서언 102
5.2. 수중 음향통신 시스템 103
5.3. 수상통신(RF) 시스템 112
5.4. 화상통신 시스템 113
5.4.1. 일반 113
5.4.2. 센서제작 및 대역폭 성능시험 114
5.4.3. 변조 및 복조 시스템의 구현 123
5.4.4. 수중영상 코딩기법 개발 127
5.4.5. 수중영상 압축기법 개발 136
5.4.6. 적응 등화기 개발사양 도출 및 알고리즘 설계 145
5.4.7. 실험 및 결과 해석 148
제6장 소프트웨어 및 사용자 인터페이스 152
6.1. 서언 152
6.2. 소프트웨어 개발환경 153
6.3. 초기화 및 디버깅 환경 154
6.4. 운용환경 155
6.5. 소프트웨어 156
6.5.1. 소프트웨어의 구조 156
6.5.2. H/W 테스트 프로그램 157
6.5.3. 자율제어 프로그램 160
6.6. 요약 163
제7장 VORAM AUV의 운동해석 164
7.1. 서언 164
7.2. 운동계수추정 164
7.2.1. 운동방정식 164
7.2.2. 해석방법 165
7.2.3. PMM 실험 방법 166
7.2.4. 수직·수평면 운동계수 추정 178
7.3. 운동 시뮬레이션 184
7.3.1. 수직면 운동 수치해석 184
7.3.2. 수평면 운동 수치해석 188
7.4. 요약 191
제8장 VORAM AUV의 운동제어 192
8.1. 서언 192
8.2. 제어 알고리듬 194
8.3. 제어기 설계과정 및 알고리듬 성능 비교 201
8.3.1. 이산 슬라이딩 모드 제어기 설계과정 201
8.3.2. AUV 심도제어의 이산·연속 슬라이딩 모드 제어 성능비교 204
8.4. VORAM호의 운동 제어 209
8.4.1. 심도제어 수치해석 209
8.4.2. 심도제어 실험 217
8.4.3. 수평면 운동 제어 227
8.5. 요약 231
제9장 소나를 이용한 충돌회피 알고리듬 232
9.1. 서언 232
9.2. 장애물 회피 소나 시스템의 특성 233
9.3. 충돌 회피 알고리듬 234
9.3.1. 전방 경사각 추정 235
9.3.2. 경사각 선정 알고리듬 236
9.4. 시뮬레이션 및 고찰 239
9.5. 요약 252
제10장 결론 253
참고문헌 260
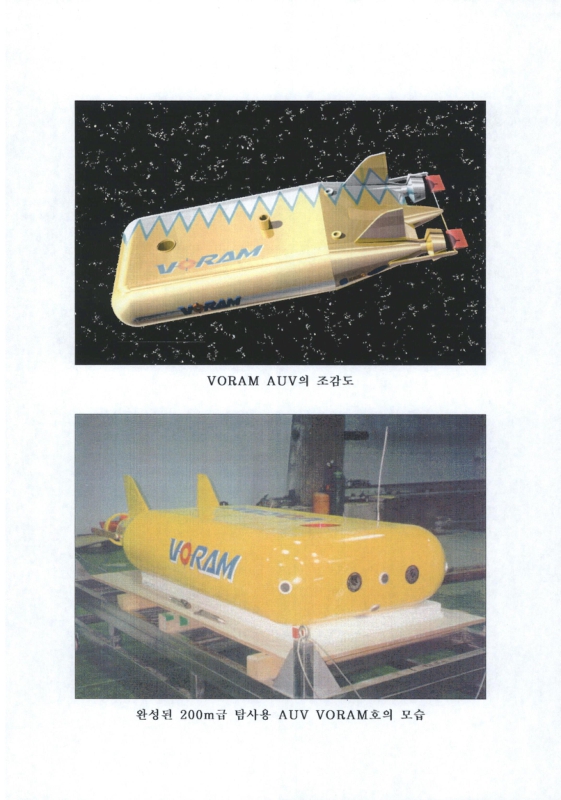
Fig. 1-1. Bird's Eye View of VORAM AUV 34
Fig. 2-1. Arrangement of main equipments 38
Fig. 2-2. Main frame and buoyant 39
Fig. 2-3. General Arrangement of VORAM AUV 40
Fig. 2-4. Camera canister and OAS canister 41
Fig. 2-5. Bottom of VORAM AUV 43
Fig. 2-6. Bottom view of VORAM AUV 44
Fig. 2-7. Vertical thruster duct and mount... 46
Fig. 2-8. Horizontal thruster and main frame 47
Fig. 2-9. Mounting of main can 48
Fig. 2-10. Head cover of image processing... 48
Fig. 2-11. Mount of batteries 49
Fig. 2-12. Mount of ATM sonar 50
Fig. 2-13. Elevator actuators 51
Fig. 3-1. Control and navigation system configuration of VORAM AUV 56
Fig. 3-2. Canisters of VORAM AUV 58
Fig. 3-3. Electric system of CAN1 58
Fig. 3-4. Electric system of CAN2 59
Fig. 3-5. Electric system of CAN4 59
Fig. 3-6. Connector definition of main control system 60
Fig. 3-7. Connector definition of IFBD1 61
Fig. 3-8. Connector definition of IFBD2 61
Fig. 3-9. Connector definition of IFBD3 62
Fig. 3-10. Connector definition of IFBD1 62
Fig. 3-11. Connector definition of CAN1 and CAN2 63
Fig. 3-12. Photo of CAN2PS 64
Fig. 3-13. Description of connection between canisters 74
Fig. 3-14. Connection of electric system in CAN1 75
Fig. 3-15. Connection of electric system in CAN2 76
Fig. 3-16. Batteries built in frame of... 77
Fig. 3-17. Flow of power on... 80
Fig. 3-18. Main contol system equipped with main... 81
Fig. 3-19. Block diagram of emergency circuit 82
Fig. 3-20. Weight drop magnet unit 83
Fig. 3-21. Drivers of thruster and elevator motors 83
Fig. 3-22. Block diagram of thruster controller 85
Fig. 3-23. Block diagram of fin actuator system 85
Fig. 4-1. Sensors of VORAM AUV 87
Fig. 4-2. OAS sonar beam directions and coordinate system 88
Fig. 4-3. OAS system block diagram 90
Fig. 4-4. OAS transducers and amps 91
Fig. 4-5. Blades of current meter 93
Fig. 4-6. Dimension of current speed meter jigger 93
Fig. 4-7. Calibration of current speed meter 94
Fig. 4-8. Sensors of motion measurement system 96
Fig. 4-9. Motion measurement system of VORAM 97
Fig. 4-10. Camera and it's canister 98
Fig. 4-11. Camera recorder built in electric system 99
Fig. 5-1. Block Diagram of Acoustic Telemetry System in Underwater 103
Fig. 5-2. Main Connector between ATM and Control Processor 107
Fig. 5-3. Transducer Connections 108
Fig. 5-4. Program Flowchart of ATM for AUV 109
Fig. 5-5. Program Flowchart of ATM for the mother ship 111
Fig. 5-6. RF Communication System at Sea Surface 112
Fig. 5-7. Equivalent circuit of the acoustic projector transducer 115
Fig. 5-8. Electrical equivalent circuit of the designed transducer with... 120
Fig. 5-9. Transmitting and Receiving Sensitivity of Transducer(TVR/RVR) 121
Fig. 5-10. Transmitting and Receiving Sensitivity of Transducer... 122
Fig. 5-11. Impedance Characteristics of Transducer in water 122
Fig. 5-12. Block Diagram of Modulator and Demodulator 124
Fig. 5-13. Synchronization Circuit of 4800bps data 125
Fig. 5-14. Configuration of QPSK Modulation Circuit 125
Fig. 5-15. FM Modulator Circuit 126
Fig. 5-16. Configuration of QPSK Demodulation Circuit 127
Fig. 5-17. 1/3 Convolutional Encoder 129
Fig. 5-18. Code Tree of Convolutional Coding 129
Fig. 5-19. State Diagram of Convolutional Encoder 132
Fig. 5-20. Trellis Diagram 133
Fig. 5-21. Decoder Flowchart for Viterbi Algorithm 135
Fig. 5-22. Huffman Encoding of DC coefficient 137
Fig. 5-23. Encoding Procedure of AC coefficient 137
Fig. 5-24. Configuration of 2 dimension Huffman Encoding 138
Fig. 5-25. Element of base image 139
Fig. 5-26. Format of compressed image data 140
Fig. 5-27. Structure of compressed image data 141
Fig. 5-28. Configuration of ISA-JPEG-BIB... 143
Fig. 5-29. Configuration of Snapper-16 Acquisition Board 144
Fig. 5-30. Flowchart for JPEG Operating Program 144
Fig. 5-31. Tapped Delay Line Structure of the LMS Algorithm 146
Fig. 5-32. π/4 QPSK Modulation and Demodulation Signal 150
Fig. 5-33. Modulator and Demodulator of Acoustic Image... 151
Fig. 6-1. Software development environment 153
Fig. 6-2. Initializing and debugging environment 154
Fig. 6-3. AUV Operation environment 155
Fig. 6-4. Software architecture of VORAM 156
Fig. 6-5. Flowchart of HW test mode 159
Fig. 6-6. An example of flowchart for depth control 162
Fig. 7-1. Model Test Equipment(PMM) Drawing 167
Fig. 7-2. Vertical PMM test of VORAM AUV 168
Fig. 7-3. Coordinate System 169
Fig. 7-4A. Vertical Inclining Test : Variation of Longitudinal Force... 170
Fig. 7-4B. Vertical Inclining Test : Variation of Pitching Moment with... 170
Fig. 7-5A. Vertical Static Test : Variation of Longitudinal Force Coefficient... 171
Fig. 7-5B. Vertical Static Test : Variation of Normal Force Coefficient with... 171
Fig. 7-5C. Vertical Static Test : Variation of Pitching Moment Coefficient... 172
Fig. 7-6A. Static Elevator Test : Variation of Normal Force Coefficient with... 172
Fig. 7-6B. Static Elevator Test : Variation of Pitching Moment Coefficient... 173
Fig. 7-6C. One-Side Elevator Test : Variation of Rolling Moment Coefficient... 173
Fig. 7-7. Pure Heave Test : Variation of In-Phase Component of... 174
Fig. 7-8. Pure Pitch Test : Variation of Out-of-Phase Component of... 175
Fig. 7-9. Model Propulsion Points 176
Fig. 7-10A. One Side Propulsion Test : Variation of Sway Force... 177
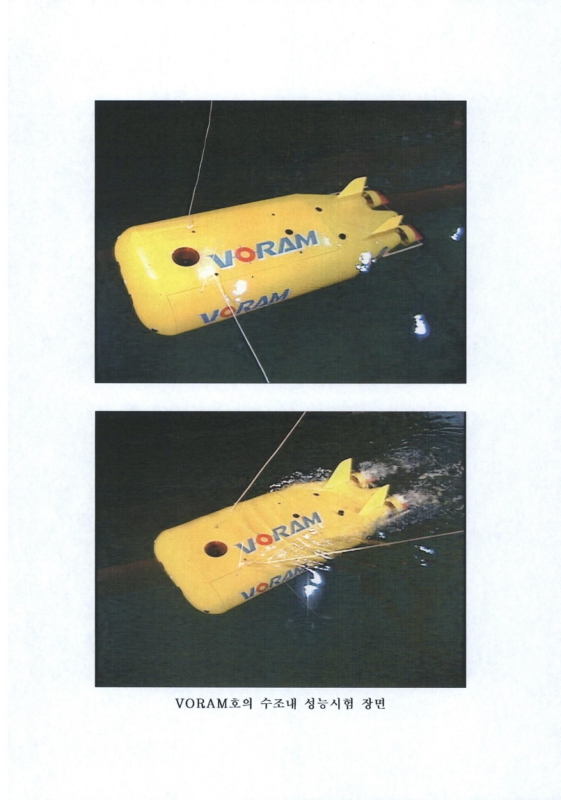
Fig. 7-10B. One Side Propulsion Test : Variation of Yaw Moment... 177
Fig. 7-11. Stability Analysis 183
Fig. 7-12A. Simulation of VORAM's vertical plane motion 185
Fig. 7-12B. Simulation of VORAM'S vertical motion (delta, Vx, Vz,... 186
Fig. 7-13. Steady state motion of VORAM according to elevator angle's... 187
Fig. 7-14. Simulation of vertical plane motion for... 188
Fig. 7-15. Zig-zag test in vertical plane 189
Fig. 7-16A. Turning test of VORAM in horizontal plane 190
Fig. 7-16B. Turning test of VORAM in horizontal plane... 190
Fig. 8-1. Variable equivalent control region of... 200
Fig. 8-2. Body fixed coordinates of an AUV 202
Fig. 8-3. Dynamic response with continuous sliding... 206
Fig. 8-4. Dynamic response with continuous sliding... 206
Fig. 8-5. Dynamic response with discrete sliding mode... 207
Fig. 8-6. Dynamic response with discrete sliding mode... 207
Fig. 8-7. Tracking control with discrete sliding mode... 208
Fig. 8-8. Depth Keeping control of VORAM with continuous sliding... 210
Fig. 8-9. Depth Keeping control of VORAM with continuous sliding... 210
Fig. 8-10. Depth Keeping control of VORAM with discrete-time... 212
Fig. 8-11. Depth Keeping control of VORAM with discrete-time... 212
Fig. 8-12. Contouring control of VORAM with continuous sliding... 214
Fig. 8-13. Contouring control of VORAM with continuous sliding... 214
Fig. 8-14. Contouring control of VORAM with discrete-time sliding... 215
Fig. 8-15. Contouring control of VORAM with discrete-time slidlng... 215
Fig. 8-16. Contouring control of VORAM with discrete-time sliding... 216
Fig. 8-17. Contouring control of VORAM with discrete-time sliding... 216
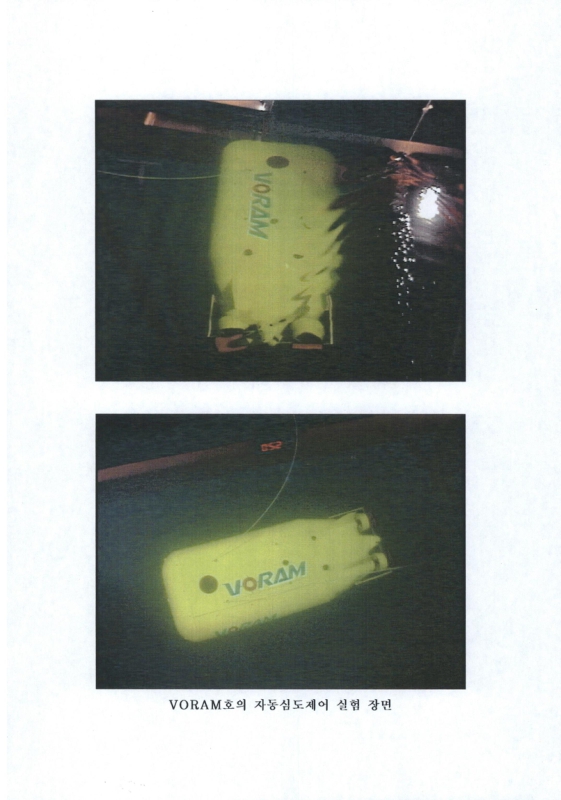
Fig. 8-18. Experiment on depth keeping control of VORAM AUV in... 218
Fig. 8-19. Experimental and numerical results of depth keeping control... 220
Fig. 8-20. Experimental and numerical results : Δt=0.5, ρ=0.8 221
Fig. 8-21. Experimental and numerical results : Δt=1.0, ρ=0.3 223
Fig. 8-22. Experimental and numerical results : Δt=1.0, ρ=0.8 224
Fig. 8-23. Experimental and numerical results : Δt=2.0, ρ=0.3 225
Fig. 8-24. Experimental and numerical results : Δt=2.0, ρ=0.3 226
Fig. 8-25A. Planar motion of VORAM AUV (X-Y plot) 229
Fig. 8-25B. Planar motion of VORAM AUV (Yaw angle) 229
Fig. 8-25C. Planar motion of VORAM AUV (Velocities) 230
Fig. 8-25D. Planar motion of VORAM AUV (Drift angle &... 230
Fig. 9-1. Geometry of Sonar Transducers and Detected Slant Range 234
Fig. 9-2. Target position and coordinate system 238
Fig. 9-3. Simulation results : heel climbing without dynamic model 240
Fig. 9-4. Simulation results : heel climbing without dynamic model 241
Fig. 9-5. Simulation results : cliff climbing... 243
Fig. 9-6. Simulation results : cliff climbing without... 244
Fig. 9-7. Simulation result : heel climbing with dynamic... 245
Fig. 9-8. Simulation result : heel climbing with dynamic... 246
Fig. 9-9. Simulation result : heel climbing with dynamic... 246
Fig. 9-10. Simulation result : heel climbing with... 247
Fig. 9-11. Simulation result : heel climbing with... 247
Fig. 9-12. Simulation result : heel climbing with... 248
Fig. 9-13. Simulation result : heel climbing with... 248
Fig. 9-14. Simulation result : heel climbing with... 249
Fig. 9-15. Simulation result : cliff climbing with... 250
Fig. 9-16. Simulation result : cliff climbing with... 250
Fig. 9-17. Simulation result : cliff climbing with... 251
Fig. 9-18. Simulation result : cliff climbing with... 251
Fig. 9-19. Simulation result : cliff climbing with... 252
| 등록번호 | 청구기호 | 권별정보 | 자료실 | 이용여부 |
|---|---|---|---|---|
| 0000748253 | 623.82 ㄱ373ㅇ | v.4 | 서울관 서고(열람신청 후 1층 대출대) | 이용중 |
*표시는 필수 입력사항입니다.
| 전화번호 |
|---|
| 기사명 | 저자명 | 페이지 | 원문 | 기사목차 |
|---|
| 번호 | 발행일자 | 권호명 | 제본정보 | 자료실 | 원문 | 신청 페이지 |
|---|
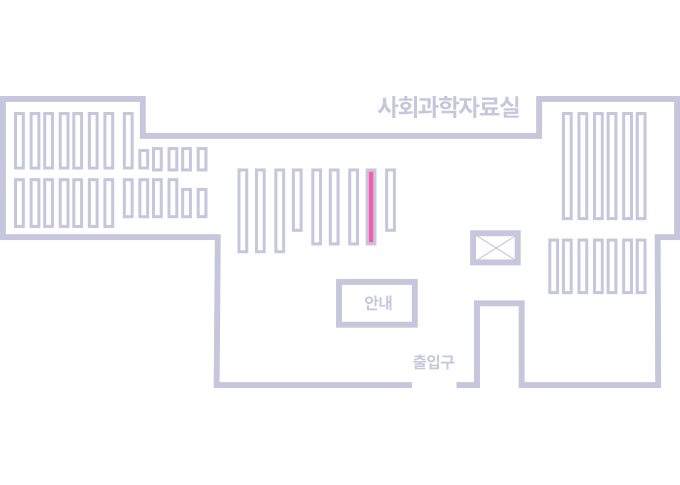
도서위치안내: / 서가번호:
우편복사 목록담기를 완료하였습니다.
*표시는 필수 입력사항입니다.
저장 되었습니다.