대표어
대표어
권호기사보기
| 기사명 | 저자명 | 페이지 | 원문 | 기사목차 |
|---|
결과 내 검색
동의어 포함
목차
[표제지 등]=0,1,2
제출문=i,3,2
요약문=iii,5,4
Summary=vii,9,4
Contents=xi,13,2
목차=xiii,15,2
그림목차=xv,17,6
표목차=xxi,23,1
제1장 연구개발 과제의 개요=1,24,6
제2장 국내ㆍ외 기술개발 현황=7,30,4
제3장 연구개발수행 내용 및 결과=11,34,1
제1절 Ion-Cut 공정의 개요=11,34,2
제2절 수소이온주입 및 웨이퍼분리 공정개발=12,35,16
제3절 웨이퍼 세정 및 접합공정 개발=28,51,43
제4절 Ion-Cut에 의한 SOI웨이퍼 제조 및 고온안정화=71,94,3
제5절 CMP 연마기술 개발=74,97,8
제6절 SOI 웨이퍼 특성조사=82,105,41
제4장 연구개발 목표 달성도 및 관련 분야에의 기여도=123,146,4
제5장 연구개발결과의 활용계획=127,150,6
제6장 연구개발과정에서 수집한 해외 과학기술정보=133,156,5
Fig. 1. Cross-Section View Of Conventional And SOI Wafers=1,24,1
Fig. 2. The Use Of The SOI According To Its Features=3,26,1
Fig. 3. SOI'S Wide Range Of Applications, Each Taking Advantage Of A Different Thickness Of The Si Layer=4,27,1
Fig. 4. Worldwide SOI Wafer Market Forecast=4,27,1
Fig. 5. SEM Cross-Sections Of (a) SOI Buried Cavity And (b) CIS(Crystal Ion Slicing) LiNb03 Film By Ion-Cut Process=5,28,1
Fig. 6. Bonded SOI Wafer Production Processes By Smart-Cut(Left) And Eltran(Right)=8,31,1
Fig. 7. Nanocleave Process Flow For Layer Transfer Production Of SOI Wafers=8,31,1
Fig. 8. Schematic Of Ion-Cut Process For Thick-SOI Wafers=12,35,1
Fig. 9. Estimated Depth Profiles Of Hydrogen Concentration For Implantation Dose Of 1X10(17) H(+))Cm₂(이미지 참조)=14,37,1
Fig. 10. Estimated SOI Thicknesses In Oxidized Si Wafer (400Nm Box) As A Function Of Proton Energy=14,37,1
Fig. 11. ERD(Elastic Recoil Detection) Spectrum From Si Implanted With 65 keV Proton Beam At Kaerl=15,38,1
Fig. 12. Cross-Sectional TEM Image Of Si Implanted With 65 keV Proton Beam At Kaerl=15,38,1
Flg. 13. ERD(Elastic Recoil Detection) Spectrum From Si Implanted With 65 keV Proton Beam=16,39,1
Fig. 14. Hydrogen Depth Profiling By Sims=16,39,1
Fig. 15. X-TEM Images Showing (a) Damaged Layer, And (b) Three Different Orientations Of Platelets In The Damaged Layer In Si Implanted At A Dose Of 6X10(16)/cm² With 65 keV Proton Beam Before Anneal(이미지 참조)=17,40,1
Fig. 16. Schematic Drawing Of Platelet Showing The Hydrogen- Terminated Planar Surfaces And A Gas Inclusion=17,40,1
Fig. 17. (a) Micrograph And (b) X-TEM Image Of Si Wafer For Implantation Dose Of 1.2X10(17) H+/cm² At 65 keV Without Thermal Treatment(이미지 참조)=18,41,1
Fig. 18. Layer Splitting Phenomenon In Smart-Cut Process=19,42,1
Fig. 19. Photographs Of Si Wafer Surface For Implantation Dose Of 6X10(16) H(+)/cm² And 9X10(16) H(+)/cm² At 65 keV With Thermal Treatment=21,44,1
Fig. 20. Photographs Of Donor Wafer Surfaces After Annealing Of Proton Implanted Wafers At Limited Doses Of 6∼8X10(16) H(+)/cm²(이미지 참조)=22,45,1
Fig. 21. The Time Evolution Of The (100) Platelet (a) Density, And (b) Size, Are Shown=22,45,1
Fig. 22. IR Spectra After 30 Min Anneals At Different Temperatures. A H(+) Dose Of 6X10(16) cm(-2) Was Implanted At 70 keV(이미지 참조)=23,46,1
Fig. 23. The Total Number Of Hydrogen, As Measured By Forward Recoil Spectroscopy(FRS), Is Compared To Infrared-Active Hydrogen=23,46,1
Fig. 24. Vibrational Raman Line Of Molecular Hydrogen H₂ At 4158 cm(-1) Is Clearly Visible In The Spectrum Taken From A Surtace Blister(이미지 참조)=24,47,1
Fig. 25. Arrhenius Plot For The Splitting Time In Bonded Wafers, And Also For The Time Required To See Blisters When There Was No Stiffner=25,48,1
Fig. 26. XTEM Images Of (a) Damaged Layer And (b) Micro-Crack After Annealing=25,48,1
Fig. 27. Total H(+) And He(++) Dose Necessary For Blistering To Occur, As A Function Of The Fraction That In H(+)(이미지 참조)=26,49,1
Fig. 28. Time Required To Form Optically Detectable Surtace Blisters In H(+) Implanted Wafers That Were Uniformly Doped With Boron And Phosphorus, As Indicated(이미지 참조)=27,50,1
Fig. 29. Types Of Wafer Bondings=29,52,1
Fig. 30. Principle Of Anodic Bonding=30,53,1
Fig. 31. Characteristics Of Wafer Bonding Methods=31,54,1
Fig. 32. Schematic Of Three Types Of Interactions Between Two Solids=32,55,1
Fig. 33. Schematic Of Definition Of Total Thickness Variation (TTV)=33,56,1
Fig. 34. Schematic Of Gaps Between Wafers For The Case Of R> 2T(W)(이미지 참조)=33,56,1
Fig. 35. Parameter Combinations Of Gap Height H And Lateral Extensions R Of Gaps Which Can Be Closed For A Si Wafer Thickness Of 525 Μm And Γ=100 Mi/M². The Area In Which Closing The Gap Can Occur Is Shaded=34,57,1
Fig. 36. Schematic Of Particle Leading To An Unbounded Area With Radius R Larger Than Wafer Thickness T(W)(이미지 참조)=35,58,1
Fig. 37. Contaminants Removal Mechanism In SC-1 Solution=36,59,1
Fig. 38. Schematic Of A Linkage Of Three Water Molecules Between Two Hydrohilic Mating Surfaces To Bridge The Wafers At Room Temperature=42,65,1
Fig. 39. Fracture Surtace Energy As Observed In Low Vacuum Bonding (a) As Function Of Annealing Temperature; (b) As Function Of Annealing Time At A Constant Annealing TEMperature Of 1508C=44,67,1
Fig. 40. Plasma Treated Si Surfaces Achieve Covalent Bonding As Low As 105℃=44,67,1
Fig. 41. Schematic Of Plasma-Activation Process Flow=45,68,1
Fig. 42. Schematic Of Metal-Bonding Setup Developed At Philips Laboratory=47,70,1
Fig. 43. The Bonding Apparatus Developed At Queen'S University=48,71,1
Fig. 44. Schematic Of The Infrared System For Aligned Wafer Bonding Developed At The University Of California, Davis=48,71,1
Fig. 45. Typical Configuration Of An Imaging System For Detection Interference Bubbles In Bonded Si/Si Pairs=50,73,1
Fig. 46. Infrared Image Of A Bonded Si/Si Pair=51,74,1
Fig. 47. Schematic Diagram Of X-Ray Transmission Topography Method=52,75,1
Fig. 48. Principle Of C-Scan Acoustic Microscopy=52,75,1
Fig. 49. Double Cantilever Beam Test Geometry Under Constant Wedging Conditions. The Razor Blade Of Thickness 2H Causes A Crack Of Length C=54,77,1
Fig. 50. Fracture Surtace Energy Derived From Various Measurements On Wafer And Beam-Like Specimens=55,78,1
Fig. 51. Schematic Diagram Of The Blister Test Method=55,78,1
Fig. 52. Tensile Test Geometries Showing (a) Principle And (b) Modification For Thin Films=56,79,1
Fig. 53. Outside View Of (a) The Clean Room, And (b) The Wafer Cleaning And Bonding System=57,80,1
Fig. 54. Schematic Drawing Of The Bonding Of Two Hydrophobic/ Hydrophilic Si Surfaces=58,81,1
Fig. 55. Monitoring Of The Particle Contamination Along The Process=58,81,1
Fig. 56. Surface Contact Angle Of Pristine Si Wafer, Silicon Oxide And Implanted Silicon Oxide=60,83,1
Fig. 57. Surface Contact Angles Of Surface Cleaned Si Wafer=60,83,1
Fig. 58. Surface Contact Angles Of Surface Cleaned Sio₂ Layer=60,83,1
Fig. 59. Layout Of Wafer Cleaning & Direct Bonding System=61,84,1
Fig. 60. Inside View Of The Wafer Cleaning System; (a) Pvdf Wafer Holder, (b) Overview Of The Wet Cleaning System, (c) SC-1 Bath, (d) Di Rinse Bath, (e) Spm Bath And (f) Spin Dryer=62,85,1
Fig. 61. High Capacity Di Water System=62,85,1
Fig. 62. Wafer Bonding & Ir Inspection SysTEM=63,86,1
Fig. 63. Sequence Of Photographs Taken With An Ir Camera, Showing The Propagation Of The Bonded Area=65,88,1
Fig. 64. IR Transmission Images Of Two Directly Bonded Wafers With Bond Interface A) With No Dust Particle And B) Contaminated With Several Large Dust Particles=65,88,1
Fig. 65. Crack Opened Wafer Pair By Razor Blade Test=70,93,1
Fig. 66. Sol Wafers Fabricated By Ion-Cut Process=71,94,1
Fig. 67. Inside View Of The High TEMperature Muffle Furnace With Quartz Wafer Box=72,95,1
Fig. 68. Oxide Layer Thickness As A Function Of N2 Flow Rate=73,96,1
Fig. 69. Tensile Strengfh Measurement Of Bonded Wafer Pair Glued Using A High-Stren0(H Epoxy Resin To The Sample Fixture=73,96,1
Fig. 70. Tensile Test Curves=73,96,1
Fig. 71. 반도체 웨이퍼 접합을 위한 흑연 시료 고정 장치=76,99,1
Fig. 72. 600℃에서 30분간 Ar 분위로 열처리된 Layer Splitting=78,101,1
Fig. 73. Lapping 용 연마장비 사진=78,101,1
Fig. 74. 연마용 시료 홀더 장치=79,102,1
Fig. 75. 연마 장비 사진=79,102,1
Fig. 76. 연마되지 않은 Si 표면의 사진과 표면거칠기=80,103,1
Fig. 77. Lapping 후 남아있는 Si 두께와 Lapping Rate=80,103,1
Fig. 78. Lapping 후 표면 거칠기=81,104,1
Fig. 79. 연마된 시료와 상용 Si 웨이퍼의 표면 거칠기 비교=81,104,1
Fig. 80. X-TEM Images Of Sol(a) Showing (a) Surface Micro-Roughness Of As-Split Sol Structure, (b) Cmp-Polished Sudace, (c) Front Interface Between Top Layer Si And Box Layer Oxide, And (d) Rear Interface Between Box And Si Substrate=82,105,1
Fig. 81. Surface Roughness Of The Splitted Wafer(#306) Surface Measured By AFM=83,106,1
Fig. 82. FE-SEM Images Of Thick SOI Structures=83,106,1
Fig. 83. Relationship Between Micro- Roughness And Proton Range Straggling=84,107,1
Fig. 84. Potential Defects In Sol Wafer=86,109,1
Fig. 85. Etching Speed Of Si (100) Wafer With Secco Etchant=87,110,1
Fig. 86. Micrographs Of Etch Pits Generated By The Secco Etching And Hf Etching=87,110,1
Fig. 87. Etch Pit Density Vs. Remaining SOI Thickness After Secco Etching And Hf Etchng For 228 Nm SOI Sample=88,111,1
Fig. 88. A Model Of KOH Etching Followed By The Secco Etching And Hf Etching=88,111,1
Fig. 89. (a) Etchlng Curve Of KOH On (100) Si Surface And (b) Etch Pit Density Following The Secco Etchlng Vs. The Depth Of The Removal In SOI Layer Using KOH=88,111,1
Fig. 90. Result Of SOI Depth Profiling By Aes=89,112,1
Fig. 91. Struture Of Pseudo-MOSFET=93,116,1
Fig. 92. I(D)-V(D). Curves Of Pseudo-Mospet(이미지 참조)=93,116,1
Fig. 93. I(D)-V(G) Curves Of Pseudo-MOSFET(이미지 참조)=94,117,1
Fig. 94. Comparfson Of Diffusion-Engineered MOSFET And Pseudo-MOSFET=94,117,1
Fig. 95. Capacitor Of SOI Wafer=95,118,1
Fig. 96. Extrapolation Of V(Fb) And V(T)(이미지 참조)=96,119,1
Fig. 97. Pseudo-MOSFET Measurement=97,120,1
Fig. 98. Rie Etching Process For Tho Fabrication Of Test Device For Pseudo-MOSFET Measurement=98,121,1
Fig. 99. TMAH Etching Process For The Fabricafion Of Measurement Test Device For Pseudo- MOSFET Measurement=98,121,1
Fig. 100. Drain Current-Voltage Curve As A Function Of Probe Pressure=99,122,1
Fig. 101. Drain Current Vs. Gate Voltage=100,123,1
Fig. 102. Contact Property Of Gate=100,123,1
Fig. 103. I(D)-V(G) Characteristics Of TMAH And Rie Etched Devices(이미지 참조)=101,124,1
Fig. 104. I(D)-V(G) Characteristics Of TMAH And Rie Etched Devices Before And After Thermal Treatment(이미지 참조)=103,126,1
Fig. 105. D(It) Varition Of TMAH And Rie Etched Devices Before And After Thermal Treatment(이미지 참조)=103,126,1
Fig. 106. Mobility Variahcn Of TMAH And Rie Etched Devices Before And After Thermal Treatment=104,127,1
Fig. 107. I(D)-V(G) Characteristics Of TMAH And Rie Etched Devices Before And After Thermal Treatment(이미지 참조)=104,127,1
Fig. 108. Pseudo-MOSFET I(D)-V(G) Curves As A Function Of Surldce Si Thickness(이미지 참조)=105,128,1
Fig. 109. V(Fb) And V(T) Curves As A Function Of Surface Si Thickness(이미지 참조)=106,129,1
Fig. 110. I(D)-V(G) Curves Of Kgam-40506A Sample(이미지 참조)=107,130,1
Fig. 111. I(D)-V(G) Curves Of KIGAM-40810B Sample(이미지 참조)=108,131,1
Fig. 112. Positional Identification Number Of Separate Devices=110,133,1
Fig. 113. Positional Mapping Of Surface Si Thickness=110,133,1
Fig. 114. Positional Mapping Of Positive Threshold Voltage=110,133,1
Fig. 115. Positional Mapping Of Negative Threshold Voltage=110,133,1
Fig. 116. Positional Mapping Of Electron Mobility=111,134,1
Fig. 117. Positional Mapping Of Hole Mobility=111,134,1
Fig. 118. Positional Mapping Of Interface Charge Density=112,135,1
Fig. 119. Mos Device For The Analysis Of Interface Characteristics=113,136,1
Fig. 120. Energy Band, Charge And Capacitance In The Ideal NMOS CAP=114,137,1
Fig. 121. Ideal CV Curve Of NMOS CAP=115,138,1
Fig. 122. The Difference Of Work Funcdon And Oxide Charge=116,139,1
Fig. 123. Mos CV Characteristic Curve For Sample 3118=118,141,1
Fig. 124. Mos CV Characteristic Curve Of Sample 306=119,142,1
Fig. 125. Mos CV Characteristic Curve Of Sample 40422A=120,143,1
Fig. 126. Mos CV Characteristic Curve Of Sample 40810B=121,144,1
Fig. 127. Mos CV Characteristic Curve Of Sample 40630=122,145,1
Fig. 128. Sol Fully Supports Future Device Generations=127,150,1
Fig. 129. Ion-Cut Market And Technology Drivers=128,151,1
*표시는 필수 입력사항입니다.
| 전화번호 |
|---|
| 기사명 | 저자명 | 페이지 | 원문 | 기사목차 |
|---|
| 번호 | 발행일자 | 권호명 | 제본정보 | 자료실 | 원문 | 신청 페이지 |
|---|
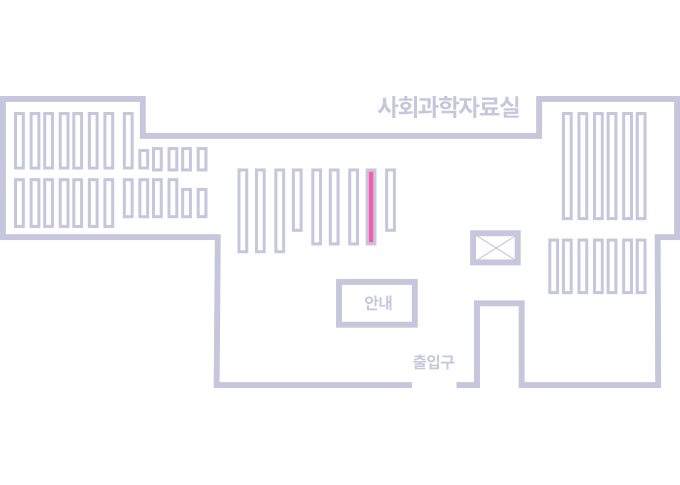
도서위치안내: / 서가번호:
우편복사 목록담기를 완료하였습니다.
*표시는 필수 입력사항입니다.
저장 되었습니다.