대표어
대표어
 https://www.nrc.gov/reading-rm/doc-collections/nuregs/staff/sr2267/
권호기사보기
| 기사명 | 저자명 | 페이지 | 원문 | 기사목차 |
|---|
결과 내 검색
동의어 포함
Title page 1
Contents 5
ABSTRACT 4
ACKNOWLEDGMENTS 13
ABBREVIATIONS 14
1.0. INTRODUCTION 16
1.1. LADTAP II Code 17
1.2. GASPAR II Code 17
1.3. XOQDOQ Code 17
1.4. NRCDose3 Code Update 17
1.5. Software Quality Assurance and Configuration Management Plans 19
2.0. INSTALLATION 20
2.1. Distribution 20
2.2. Installation 20
2.2.1. Installation Process 20
2.2.2. Code Support 27
2.2.3. Code Error and Problem Reporting 27
3.0. LADTAP 28
3.1. Toolbar and Initial Setup 30
3.1.1. File Tool 30
3.1.2. Quit Tool 32
3.1.3. About Tool 32
3.1.4. Scenario Field 33
3.1.5. Source Term Field 33
3.1.6. Dose Factors Drop-Down Menu 33
3.2. Data Input Tabs 34
3.2.1. Selections Tab 34
3.2.1.1. Input Fields and Radio Buttons 35
3.2.1.2. Population Fractions 36
3.2.1.3. Reconcentration 37
3.2.1.4. Source Term 39
3.2.2. ALARA Locations Tab 41
3.2.2.1. ALARA-Max. Individual 41
3.2.2.2. Additional Usage Locations 44
3.2.2.3. ALARA-Additional Location 45
3.2.3. Fish/Population/Biota Tab 46
3.2.3.1. Fish Usage 47
3.2.3.2. Population Usage 48
3.2.3.3. Biota Locations 50
3.2.4. Irrigation Food Data Tab 54
3.2.4.1. Irrigated Food Pathways 55
3.2.4.2. Water Usage Locations 58
3.2.5. Dose Factors Tab 59
3.2.6. Pathway Factors Tab 62
3.2.6.1. Liquid Pathway Parameters 63
3.2.6.2. Bioaccumulation Factors 65
3.2.6.3. Usage/Consumption 67
3.2.6.4. Page Defaults 69
3.3. Code Execution and Reports 69
3.3.1. Executing LADTAP 69
3.3.2. LADTAP Reports 74
4.0. GASPAR 77
4.1. Toolbar and Initial Setup 79
4.1.1. File Tool 79
4.1.2. Quit Tool 81
4.1.3. About Tool 81
4.1.4. Case Title Field 82
4.1.5. Dose Factors Drop-Down Menu 82
4.2. Data Input Tabs 83
4.2.1. Options Tab 84
4.2.1.1. Options Tab-Left-Hand Side Options 84
4.2.1.2. Biota Dose Modeling and "Add Biota" Button 86
4.2.1.3. Options Tab-Right-Hand Side Options 89
4.2.2. Source Term Tab 91
4.2.3. Pop/Prod Data Tab 94
4.2.3.1. Population 95
4.2.3.2. Milk Production 96
4.2.3.3. Meat Production 96
4.2.3.4. Vegetable Production 96
4.2.3.5. Meteorological 96
4.2.4. Special Location Data Tab 99
4.2.5. Dose Factors Tab 100
4.2.6. Pathway Factors Tab 103
4.2.6.1. General Pathway Parameters 104
4.2.6.2. Holdup and Transport Times 105
4.2.6.3. Goat Feed to Milk Transfer Factors 106
4.2.6.4. Physical Parameters 106
4.2.6.5. Transfer Factors 107
4.2.6.6. Page Defaults 107
4.2.7. Consumption Values Tab 108
4.3. Code Execution and Reports 110
4.3.1. Executing GASPAR 110
4.3.2. GASPAR Reports 115
5.0. XOQDOQ 117
5.1. Toolbar and Initial Setup 118
5.1.1. File Tool 118
5.1.2. Quit Tool 120
5.1.3. About Tool 120
5.1.4. Main Title Field 120
5.2. Data Input Tabs 121
5.2.1. Options/Parameters Tab 121
5.2.1.1. Options 121
5.2.1.2. Parameters 123
5.2.2. Met Data Tab 128
5.3. Code Execution and Reporting 132
6.0. SIGNIFICANT REVISIONS IN NRCDose3 142
6.1. ICRP-30 DCF Values 142
6.2. ICRP-72 DCF Values 143
6.3. Biota Dose in GASPAR 144
7.0. REFERENCES 148
APPENDIX A. RADIONUCLIDES IN REACTOR EFFLUENTS IN NRCDose3 151
APPENDIX B. USER-MODIFIABLE PARAMETERS 162
APPENDIX C. USAGE PARAMETERS 183
APPENDIX D. EFFECTIVE RADIUS 187
APPENDIX E. ASSUMED F₁ VALUES AND INHALATION CLASS 196
Figure 2-1. Installation Welcome Screen 21
Figure 2-2. Installation Folder Screen 21
Figure 2-3. Shortcut Folder Screen 22
Figure 2-4. Installation Confirmation Screen 23
Figure 2-5. Installation Progress Screen 23
Figure 2-6. Installation Completion Screen 24
Figure 2-7. NRCDose3 Shortcut Icon 24
Figure 2-8. NRCDose3 Main Selection Screen 25
Figure 2-9. About NRCDose3 Screen 26
Figure 2-10. Manuals Tool Drop-down Menu 26
Figure 3-1. NRCDose3 Main Selection Screen (LADTAP Module) 29
Figure 3-2. LADTAP Module Main Screen 30
Figure 3-3. LADTAP Toolbar with File Drop-down Menu 31
Figure 3-4. LADTAP Module Quit Tool Screen 32
Figure 3-5. About LADTAP Screen 32
Figure 3-6. LADTAP Dose Factors Drop-down Menu 34
Figure 3-7. Selections Tab 35
Figure 3-8. Population Fractions Screen 37
Figure 3-9. R-Factor Model Options 38
Figure 3-10. DCF Warning Message 39
Figure 3-11. Select Nuclide Screens 40
Figure 3-12. ALARA Locations Tab 41
Figure 3-13. Dilution Factor Calculation Screen 42
Figure 3-14. Max Individual Consumption Screen 44
Figure 3-15. ALARA-Additional Location Section, Activated 45
Figure 3-16. Add. Locations Usage/Consumption Screen 46
Figure 3-17. Fish/Population/Biota Tab 47
Figure 3-18. Fish Usage Section of the Fish/Population/Biota Tab 48
Figure 3-19. Population Usage Section of the Fish/Population/Biota Tab 49
Figure 3-20. Biota Locations Section of the Fish/Population/Biota Tab 51
Figure 3-21. Additional Biota Types Screen 53
Figure 3-22. Irrigation Food Data Tab 54
Figure 3-23. Irrigation Food Data Note Screen 55
Figure 3-24. Irrigated Food Data Subsection 56
Figure 3-25. Usage/Consumption Screen 57
Figure 3-26. Water Usage Data Subsection 58
Figure 3-27. Dose Factors Tab with DCF Methodology and Age/Pathway Options 59
Figure 3-28. Dose Factors Tab with ICRP-2 DCF Values for Review 61
Figure 3-29. Nuclide Data Screen 62
Figure 3-30. Pathway Factors Tab 63
Figure 3-31. Bioaccumulation Factors & Transfer Coefficients Screen 66
Figure 3-32. Bioaccumulation Factors & Transfer Coefficients Prompt Screens 67
Figure 3-33. Usage/Consumption Data Screen 68
Figure 3-34. Saving LADTAP Inputs 69
Figure 3-35. Windows Explorer Directory for Saving LADTAP Inputs to a New File 70
Figure 3-36. LADTAP Module Main Screen-"Create Input" Button 71
Figure 3-37. Viewing LADTAP Input-Text Viewer Screen 72
Figure 3-38. LADTAP Module Main Screen-"Run LADTAP" Button 73
Figure 3-39. Viewing LADTAP Output-Text Viewer Screen 74
Figure 3-40. LADTAP FSAR Input Report Screen 75
Figure 3-41. LADTAP Supplemental Report Screen 76
Figure 4-1. NRCDose3 Main Selection Screen (GASPAR Module) 78
Figure 4-2. GASPAR Module Main Screen 79
Figure 4-3. GASPAR Toolbar with File Drop-down Menu 80
Figure 4-4. GASPAR Module Quit Tool Screen 81
Figure 4-5. About GASPAR Screen 81
Figure 4-6. GASPAR Dose Factors Drop-down Menu 83
Figure 4-7. Options Tab 84
Figure 4-8. Population Data Warning Screens 85
Figure 4-9. PARTS Calculation Information Screens 86
Figure 4-10. PARTS Information Screen 86
Figure 4-11. Additional Biota Types Screen 89
Figure 4-12. Humidity Information Screen 90
Figure 4-13. Humidity Alert Screen 90
Figure 4-14. Purge Information Screen 92
Figure 4-15. Excess Purge Warning 92
Figure 4-16. Source Term Tab 93
Figure 4-17. Source Term Warning Message 94
Figure 4-18. Pop/Production Data Tab 95
Figure 4-19. Clear Data Warning Screen 96
Figure 4-20. Pop/Production Data Tab-Meteorological Data 97
Figure 4-21. Windows Explorer Directory for Importing Meteorological Data to GASPAR 98
Figure 4-22. Example MS Excel File for Meteorological Data 98
Figure 4-23. Special Location Data Tab 99
Figure 4-24. Dose Factors Tab 101
Figure 4-25. Nuclide Data Screen 102
Figure 4-26. Noble Gas Submersion DFs-Default Screen 103
Figure 4-27. Pathway Factors Tab 104
Figure 4-28. Transfer Factors Screen 107
Figure 4-29. Consumption Values Tab 109
Figure 4-30. Saving GASPAR Inputs 111
Figure 4-31. Windows Explorer Directory for Saving GASPAR Inputs to a New File 111
Figure 4-32. GASPAR Module Main Screen-"Create Input" Button 112
Figure 4-33. Viewing GASPAR Input-Text Viewer Screen 113
Figure 4-34. GASPAR Module Main Screen-"Run GASPAR" Button 114
Figure 4-35. Viewing GASPAR Output-Text Viewer Screen 114
Figure 4-36. GASPAR FSAR Input Report Screen 115
Figure 4-37. GASPAR Supplemental Report Screen 116
Figure 5-1. NRCDose3 Main Selection Screen (XOQDOQ Module) 117
Figure 5-2. XOQDOQ Module Main Screen 118
Figure 5-3. XOQDOQ Toolbar with File Drop-down Menu 119
Figure 5-4. XOQDOQ Module Quit Tool Screen 120
Figure 5-5. About XOQDOQ Screen 120
Figure 5-6. Options/Parameters Tab 121
Figure 5-7. Terrain Height Values Screen 123
Figure 5-8. Receptor Types and Receptor Locations Screens 124
Figure 5-9. Location Selection and Release Point Data Screens 125
Figure 5-10. Distance Corrections Screen 127
Figure 5-11. Building Wake Constant Warning Window 127
Figure 5-12. Met Data Tab 128
Figure 5-13. Maximum Wind Speeds Screen 129
Figure 5-14. Importing JFD Information 132
Figure 5-15. Clear Grid JFDs Screen 132
Figure 5-16. Saving XOQDOQ Inputs 133
Figure 5-17. Windows Explorer Directory for Saving XOQDOQ Inputs to a New File 134
Figure 5-18. XOQDOQ Check Screen 134
Figure 5-19. XOQDOQ Module Main Screen-"Create Input" Button 135
Figure 5-20. Viewing XOQDOQ Input-Text Viewer Screen 136
Figure 5-21. XOQDOQ Module Main Screen-"Run XOQDOQ" Button 137
Figure 5-22. Viewing XOQDOQ Output-Text Viewer Screen 138
Figure 5-23. XOQDOQ Module Main Screen-"Create Alternate X/Q and D/Q Input" Button 139
Figure 5-24. Alt Met Input Screen 140
Figure 5-25. Viewing Alternate Meteorological Input-Text Viewer Screen 140
*표시는 필수 입력사항입니다.
| 전화번호 |
|---|
| 기사명 | 저자명 | 페이지 | 원문 | 기사목차 |
|---|
| 번호 | 발행일자 | 권호명 | 제본정보 | 자료실 | 원문 | 신청 페이지 |
|---|
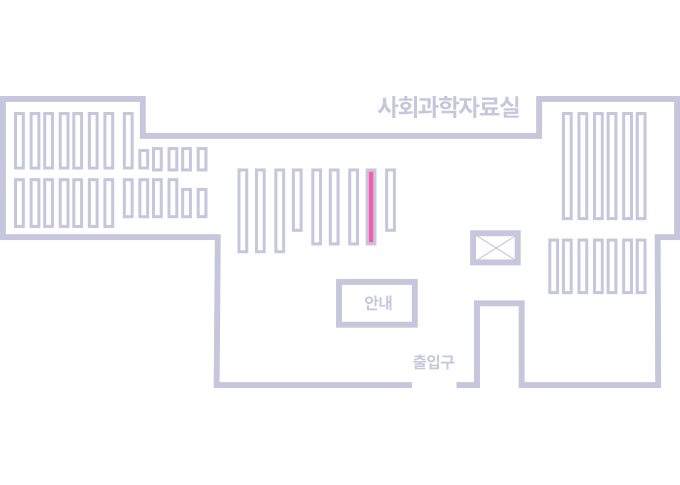
도서위치안내: / 서가번호:
우편복사 목록담기를 완료하였습니다.
*표시는 필수 입력사항입니다.
저장 되었습니다.